Friday, May 9, 2014

One Fast Friday Finish

That was one fast finish! I just started knitting with my Mother's Day yarn on Wednesday morning, and I finished my Shawlcowl Pullover last evening.


I love the way this little shawl - cowl works. It has the look of a small shawl, but it is knit in the round, so it wears like a cowl.

Not to mention this photo shows the true-blue of Jilly's gorgeous superwash merino.

Here's what the back looks like:


Very clever, no? I'll be watching designer Susan Elston on Ravelry for more of her patterns.

If you missed the story of this yarn, click back to yesterday's post. The Shawlcowl took only 45 grams of the Jilly dream yarn, so I have 70 grams left. It's really a sock yarn, and I don't knit socks anymore. Any ideas what I should do with the remaining 250+ yards of this gorgeous stuff?

Linking up to fo friday with Tami's Amis.


Younger Son aka My Little Sailor should be posting this year's Mother's Day greeting tomorrow. I'll be watching for it, will you?


From the desk of your auntmartisignature

Thursday, May 8, 2014

Thursday Knits: Happy Mama, Happy Mother's Day!

Last year, the Younger Son, aka My Little Sailor, published a touching post on 52 Quilts in 52 Weeks. Yeah. He made me cry. I'm sure that was his plan.

This year, he ordered this gorgeous yarn gifty from The Loopy Ewe.

2014 Mother's Day/Spring Kit from The Loopy Ewe

I opened it thinking "oh, I don't remember ordering anything from the Loopy Ewe."

Yum!

The yarn is a gorgeous 100% superwash merino in an exclusive hand-dyed blue named "Finally, Spring!"

I knew just what I wanted to knit. It's the "Shawlcowl Pullover" by Susan Elston, available on Ravelry.

I'm further along than this photo shows, but I wanted to get this post up for Thursday Knits!


The photo by The Loopy Ewe is much more true to the color of the yarn. It reminds me of the Colorado cerulean blue sky.

Happy Mother's Day to all who are mothers, or all who have a mother!


From the desk of your auntmartisignature

Wednesday, May 7, 2014

WIP Wednesday

I'm desperately behind on my Block of the Month projects. Because I wanted to share some new Flying Geese tricks yesterday, I'm up-to-date on at least one!

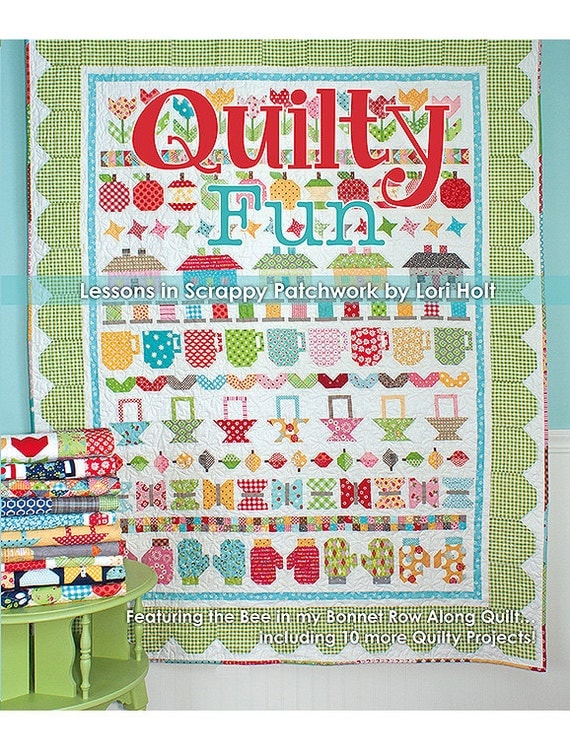
One of my Block Parties at Ruth's Stitchery is making Lori Holt's "Quilty Fun" row quilt.

Quilty Fun "Lessons in Scrappy Patchwork" by Lori Holt
We've completed five rows so far. This week I finished 48 teeny tiny Flying Geese for row 5:


Oops -- I found the fifth row in my "Quilty Fun" bin after I took the photo.

Here are some close-up of this week's Flying Geese row:


Those "geese" are only 1.5" by 2" finished! I'm really pleased with the way they turned out.

I plan to have a sneak preview of my Mother's Day gifty from My Little Sailor tomorrow. Hope you'll come back to see how it's coming along!

From the desk of your auntmartisignature

Tuesday, May 6, 2014

Tuesday Tool: Perfect Flying Geese

I know I'm always complaining about Flying Geese. This time, I think I've found the way to make perfect Geese!

This method combines three other methods/tools. The basic idea is the same as the "No Waste Method for Making Flying Geese Units." The earliest reference to "No-Waste Flying Geese" I could find was published in 2000 by Patti Anderson. She published an excellent reference chart for making geese in any size, here. [BTW, Patti, if you see this post, I'm sorry I couldn't find a way to contact you to ask permission to reference your tutorial.]

The second tool is new to me. It's the "Corner Cutter" tool from Perkins Dry Goods. This tool uses the same dimensions as the No-Waste method, with the addition of a clever little tool to cut off the corners of the "wings" before they are sewn to the "goose" square.


Step three uses my favorite square-up ruler from Bloc_Loc:


Here we go with step-by-step instructions for perfectly sized flying geese:

1. Cut one large and four small squares according to the size of the finished geese desired.


2. Draw a line corner to corner on each small square. Stack the four squares so all edges are even.


3. Place the corner cutter tool on top of the stack of four small squares. See the little line that reads "Align raw edge here? There's one on either side of the Corner Cutter.


4. With both of those lines aligned on the raw edges of the small squares, you'll cut off the perfect amount of the corners.

5. Cut off one only one corner on all four small squares.


6. Your stack of four squares will look like this:


7. Place the small squares on top of the large square with the chopped-off corners in the center.


8. Stitch a scant 1/4" seam on either side of the center line.


9. Cut on the center line.


10. Press the "wings" away from the larger piece. See where you chopped off the corner using the Corner Cutter Tool? That curtails the extra layers that are there in the No-Waste method.


11.  Press both "wings" away from the larger piece (goose).


 12. Place the remaining two small squares on top of the two larger geese that already have "wings."


13. Again, sew a scant 1/4" on either side of the line and cut on that line. Press the "wings" away from the "goose."


14. Now it's time for the Bloc_Loc Flying Geese Ruler. As do all Bloc_Loc rulers, the Flying Geese ruler has a groove on the bottom that "locks" over the seam allowance. Trim all four sides.


Here are two tiny Flying Geese. The smaller one is .75" by 1.5" finished, the larger is 1" by 2" finished.


Even this tiny, with the three-method trick, they're perfect!


Like my nail polish? It's "Jewell" by Zoya.


Come back tomorrow to see what I'm doing with those tiny Flying Geese!


From the desk of your auntmartisignature

Monday, May 5, 2014

Weekend Mountain Retreat

I was so lucky to be invited to join a group of hand spinners for their retreat this weekend. 

Now, I'm not a spinner. My Little Sailor The Fiberisto tried time and again to teach me to use his Ashford "Joy" spinning wheel. Using a spinning wheel is kind of like of like patting your head, rubbing your tummy and chewing gum -- all at the same time. 

I found his drop spindle while packing yarn for the weekend. Friend Mary patiently showed me how to work it. And I spun about two yards of alpaca fiber left over from making thrummed mittens,


The most fun was dyeing yarn with master-dyer Peggy Doney. The theme for the weekend was "Italy," so Peggy chose dye colors that evoke the Italian countryside. Here's some yarn in progress by Julie:


Here are the finished products, drying in the sunshine:


That mostly-white skein on the top row is mine. I can't wait to see how it knits up! I've washed it and wound it into a center-pull ball:


Here's a close up of the second skein I dyed. Aren't the colors rich?


It was a lovely location:


The sound of the rushing water is so soothing. 


A herd of elk provided free entertainment. They had moved off to the forest before I got my camera out, but they were close by mornings and evenings.


What a perfect weekend in the mountains!

From the desk of your auntmartisignature

Sunday, May 4, 2014

A Scrappy Sunday Finish!

At last! I have the piecing of my "Celtic Solstice" quilt complete.

As you probably know, this quilt was Bonnie Hunter's Holiday 2013 mystery project.  Celtic Solstice concluded January 1, 2014 -- but you can still print out the steps from Bonnie's blog, Quiltville's Quips & Snips, here.

It's really hard to get a good photo on a windy day!


Here is the link up, if you'd like to see what others did for the mystery.

celticlogo250_thumb[1]

Bonnie's patterns are always fun. I have all the parts to the previous year's mystery, Easy Street. That will be my next "Sunday Scraps" project. Here is the link to the Flickr group, if you haven't seen this quilt.

From the desk of your auntmartisignature